Thursday, December 10, 2009

Rain, wind, snow, and really cold work

I talked to Newt on Tuesday morning. I was worried that some of the foam sheets we had stacked up and some of the Nudura forms that hadn't been laid yet, would get blown into the next county, by the wind they were predicting we would get. Newt ran out to the property, and re-stacked the foam down in the excavation, beside the walls, so it was sheltered, then piled some wood and re-bar on top to hold it down. He also set the unused forms down in the excavation. Tuesday night the rain started. We got a fair amount of rain, then the wind picked up. We were supposed to get gusts to 55 MPH. I was a little worried about the Nudura forms that had been laid, since they are just attached with spray foam adhesive to the footers at this point.

Today I got to go out to the property, to see if any damage had been done. Thankfully, the walls seem to be where we left them, and there were only a few pieces from the garbage pile that had gotten blown around. I cleaned that up, and got to work on the second loop of PEX for the master bedroom. A nearby weather report, indicates we had winds gusting to 25 MPH and only got up to around 23 degrees F today. Yes, I can verify, it was very cold, and quite windy at my property. I managed to get the tubing laid, but the zip ties are not tightened down yet, and they haven't been clipped off yet. I'll do that tomorrow. It is supposed to be warmer, and less windy tomorrow, so hopefully I can build a fire, and that will help.


Now most of the PEX is laid. White and red loops in the forground on the right side, are in the master bedroom.


Why, yes that is snow along the south wall. The funny loop in the red tubing, in the middle of the left side, is where the front door will come in. It will be good to have a little extra heat there.

Tomorrow, I am hoping to be able to lay the last three loops. I have most of the parts I need for pressure testing the tubing. So if I can finish laying the tubing tomorrow, and pressure test on Sunday afternoon, then we would be ready for an inspection, and concrete pour. Monday looks like it might be warm enough to pour concrete, then it looks like it is going to get cold again. So I am hoping I can get the work done on the radiant floor tubing by the end of the weekend.

Monday, December 7, 2009

3 days of fire, zip ties, and PEX

Well, its been a fun three days.

Saturday:

I loaded up the PEX in the truck and headed to the property. Newt met me out there, and we got a fire going, from some of the lumber waste from making the concrete forms in the garage, and from some dead wood on the property. It ended up being a smoky fire, but it did help take the chill off to occasionally stop and lean over it. I had gotten some marking done Friday night, but it wasn't much as you can see, and the lines for the walls hadn't turned out all that well.


I had just a few lines.

With Newt's help, we got all the walls marked out, marked where the doors would go, and finished marking things where I didn't want to run the PEX under. Then we started our battle with the PEX. First we put a board up, that we could attach the ends to. This is in the utility room, and it is where the PEX will get connected to all the valves, pumps, and the manifolds for the distribution system. Then we started with the PEX for the office. While Newt unrolled the PEX, I followed my diagram, and used zip ties to attach the PEX to the wire mesh that the concrete guys had layed out.


The office is in the top center, and has the white PEX looping back and fort on the floor.

The PEX was very stiff, and kept wanting to twist up on us. After we got the office done, we decided to continue on with the family room. The family room has two loops of PEX. Its layout was quite a bit more complicated than the office. As we went, we were learning how to get the PEX to cooperate better. By mid afternoon, we had the family room done.

 
 Office, and family room now have PEX.


From another angle.

 
Here, you can see where we are attaching the supply and return for each loop, to our board.

We both had commitments elsewhere for the evening, so we called it a day, as far as the PEX was concerned.

Sunday:

I went back out to the property Sunday afternoon, as the weather was good, and I wanted to get some more of the PEX layed. It was slower with only one person to both attach the PEX, and to try to manage the unrully roll of PEX. But I managed to get one of the loops in the kitchen almost done before dark. At least working down in the excavation, I was sheltered from the wind, so it wasn't as cold as it might have been.

Monday:

Today was an adventure. We had just a skim of snow, but it froze into a sheet of ice in places. I made good use of the 4 wheel drive on the truck this morning. I ended up taking a detour since people were sliding off the road on my usual route to the property. On my detour, I saw a few incidents where someone was definitely driving too fast for conditions. I took it slow, so it took me a while to get to the property. The snow did offer nice views.

 
 Foam forms, and my Mt. Fuji of gravel

I decided I wanted a fire, since I knew I was going to get damp today with the snow covering the floor, and the PEX. It took a bit, but I managed to get a nice little fire going. I used it quite often today to try to dry out my gloves, and to keep my hands warm.

I worked most of the day by myself. It was slower going, as I was battling the PEX roll, trying to do zip ties, with the gloves on, and trying to get the cold PEX to bend into the loops I wanted. I was also stopping regularly to try to dry out the gloves. I managed to finish the loops in the kitchen and start the loop for the guest bedroom. Newt was able to escape from meetings in the afternoon, and came out. With his help, we finished up the guest bedroom, and got one of the two loops done for the master bedroom. That finished off the roll of red PEX. I am estimating I have between 10 and 12 feet left. That was cutting it close. We must have layed it down pretty close to the plan, I was supposed to have 21 feet left, and that wasn't counting the lengths that we are leaving at the board.


Here is what it looked like, before we started on the master bedroom.

We still have 4 loops. The second loop in the master bedroom, the loop in the hobby room, and the two that will probably be the most challenging, the ones in the bathrooms. The bathrooms will be challenging, because I want to place the tubing closer together to provide more heat in a given area of floor. But the rooms are small, and the PEX is proving quite obstinate in how it wants to bend. So I am going to look over the plan, and come up with a different way to arange the PEX for those two rooms.

Friday, December 4, 2009

Ready for tubing, lots of tubing

Well, today didn't go quite as planned. I was delayed getting to the property, and when I did, I only had about an hour to work before it was too dark to check my measurements. The concrete guys look to be ready to pour, once we have the PEX layed out. They also need a day that is warm enough. Since the concrete will be my finished floor, once it is stained, it is important that the pour goes well.


The only area that doesn't have foam, is the garage.

I talked to Newt. We decided since I am not heating the floor in the garage, to forgo the foam under it. All the forms are in place to do the first pour. They have the forms set up, so that they can pour all the living area, and the slab for the utility room, which will be 2 inches lower. We are doing this, so if there is a leak in there, it is unlikely to go into the rest of the house.

I tried to lay out where the walls, and other things are. However one person, trying to get accurate measurements with tape measures sitting on top of wire mesh, well lets just say it was not that productive. So tomorrow, Newt and I are going to get an early start. We are probably going to build a fire to try to warm ourselves, and the PEX. We will just have to see how things go. We will discuss a couple issues, such as exactly how the front door is going to play into the poured concrete, and get things marked. Hopefully, we will also be able to lay a good amount of the PEX tomorrow.

Thursday, December 3, 2009

I am going to have a well insulated house, or a very large ice chest!

Newt ran around yesterday tracking down the foam I wanted to use for under the floor. He had a challenge, because we didn't want to wait for a special shipment, so he had to visit multiple Home Depot stores to get all the foam that is needed for under the slab.

Today, the concrete contractors were busy laying it down. They added more gravel, so the plumbing was pretty well buried. Then they got the gravel evened out.


Here he is spreading the gravel and getting it roughly even.


Then he uses a screed, just like it was concrete, to get it very level, and even.

Once the gravel is evened out, he lays down the next piece of foam.

 
They are cutting out places for the plumbing to come up through before they can lay this piece down. You can see where the radon vent is sticking up through the other piece of foam. 

Once they get the foam sheets down, they are putting tape over the seams to hold it in place, and to work on making it resist passing vapors up from the ground.


Putting tape on seams.

When I left, they were expecting to be able to finish the foam, put a layer of plastic sheeting over top, and get the wire mesh down by lunch tomorrow. Tomorrow afternoon if all goes well, I am going to go out, and paint lines where the walls, doors, windows, cabinets and radiant tubing will go. I am going to do that so that when Newt and I work on laying the tubing, it will already be worked out where everything is suppost to go.

With the walls and other features marked, if we decide to make a change to where we are laying the tubing, we will know where we should avoid. We don't want to lay tubing under cabinets, because it won't heat effectivly under them, and if food is stored in the cabinets, the food could go bad prematurely. I certainly don't want to put heat under my refrigerator. It is best to avoid putting the tubing under walls, because when they attach the walls to the concrete, they could punture a tube, if the tube is up too high in the concrete.

It looks like Newt and I are going to try to lay the PEX down on Saturday morning. I am not sure how successful we will be, since it can be difficult to bend it when it is cold, and Saturday is certainly not looking like balmy weather.


Now I have mentioned that we have quite a bit of wild life in the area. We also have interesting domesticated animals nearby. At one house on my road, they have peacocks. I decided to take a photo today through the windshield. It didn't turn out too bad, but I will have to get some when they have their tails spread.


Monday, November 30, 2009

It all flows downhill, and that is good

When I got to the property today, they were finishing up the forms for the bottom part of the wall. They were filling in the areas around the footers where they dropped, and spraying foam into small gaps to seal things up. I saw that the plumber had been there, and had put in most of the drainage system. Maybe he worked on Black Friday to stay away from the crowds :-) The main waste line, goes from the kitchen all the way across the home, to the west wall. The lines from the two bathrooms and the utility room tie into this line.


Kitchen sink drain is just out of view to the left.

Newt was coming out to the property, but before he got there, the concrete contractor was looking over the plans and had a question about how the radon vent was being run. I explained that it was coming in over the ceiling through the garage, and then dropping down inside the master bathroom wall to where it would run under the slab. I am not positive that I will need a radon vent, but it would be very costly on this house to add one after it is built. So they measured and buried a length of drain pipe that can be tied into later to complete the radon vent.


The black pipe sticking up out of the gravel is the vent.

Newt and I looked things over. Newt had asked the plumber to put the floor drain in the utility room, right next to where the wall between the utility and office is. Newt wasn't sure it was in the right place. He got out the tape measure, and we checked, and it was right where it was suposed to be.

We discussed a bit about how the insulation would be put down on top of the gravel and how the drain was positioned. We talked to the concrete contractor about the vapor barrier and the insulation. He said it would be best to set down the insulation, then the vapor barrier. If he put down the vapor barrier first, then walking across the gravel to put down the vapor barrier would leave bumps and depressions in the gravel under the insulation. If he put down the insulation first, he could keep the gravel level and smooth as he did that and then walking over the insulation, he could put down the vapor barrier without messing up the gravel. That would also prevent a corner of the insulation from floating up in the concrete as it is poured and worked.

The drain pipes hadn't been buried as much as we would have intended. After I discussed it with Newt, I decided we had some height to play with (Hobbits don't need high ceilings), so it was decided to add more gravel up to the top of the footings, so that the drain lines will be completly buried (except at the kitchen sink). Then we will have the 2 inch insulation sitting over pretty much everything, before we pour the floor. This will minimize the areas that have to be cut in the foam to accommodate plumbing. We will loose a couple more inches of ceiling height in the back rooms, but I wanted a cozy feel in the family room, and a bit lower ceiling should actually help that.

Newt is working to see if Lowes can get him a better price than I got from Home Depot for the insulation that will go on the roof.

I am working on the radiant heating system. I have a handful of pages to finish reading in my text book. I started laying out where the tubing will go in the floor. I am also working on the rest of the design to make sure that the tubing that goes in the floor will work OK for the system. I picked up a couple thousand feet of tubing, and zip ties for fastening it down. Between that and the parts that I have bought for the solar power system, my bedroom is looking like an industrial supply store.

It is looking like Newt and I may be trying to lay the radiant tubing later in the week. With the cold temperatures, this could be a challenge, as the tubing won't bend as easily when it is cold.

I went back out later in the day, and got to meet the plumber. He had to finish a couple things before it could be inspected tomorrow. He had to take the waste line out through the west wall so it can be connected into the septic system later. He also had to add forms to keep concrete away from where the drain for the tubs was stubbed out. He did this, so that after they pour the floor, he will have easy access to the location where the traps have to be put in for the tubs. He also needed to put on a valve, that will allow them to pressurize the drain system, and verify that it does not leak. He had a little trouble with that, as it was getting cold and the glue did not want to hold the plugs in the pipes, so he couldn't do a pressure test this evening. They will need to pressurize the system tomorrow to check it out.

This evening, we had a full moon which I got a picture of. We also had geese flying over the property.


Full moon over plumbing.

Hmmm, I think after this is my home, I am going to need to shop for a more advanced camera. I am getting photo opportunities that my current camera can't do justice.

Wednesday, November 25, 2009

Walls of foam Lego blocks

I went out to the property to see what they were up to today. They were building walls of foam.


Getting another form to add to the wall.

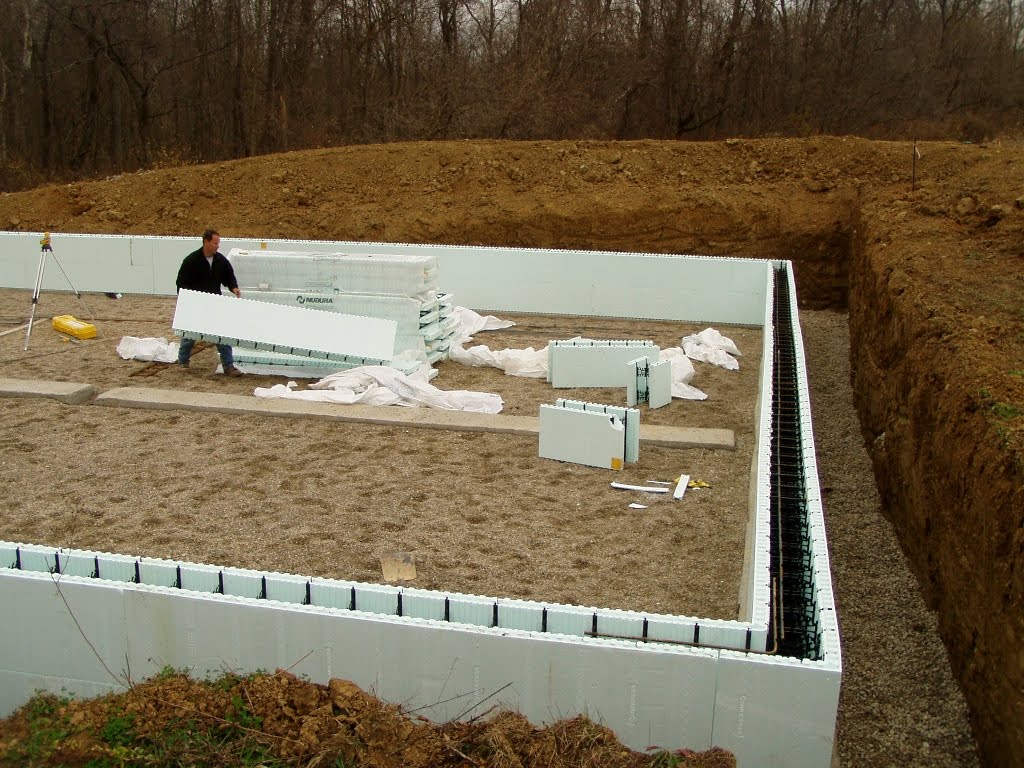
These are the forms for the concrete. They are made from expanded polystyrene foam (similar to what is used in a foam coffee cup) and high density polypropylene. On the top and bottom of each form, there are plugs and sockets, sort of like Lego blocks. When they stack the blocks, these plugs and sockets get connected together and hold the forms in place with respect to one another. There are pieces of high density polypropylene that connect the two sides of the form together. These ties, will be embedded in the concrete, and also hold the steel that will reinforce the wall. Right now, we are just getting the first couple of layers put up, so that the bottom of the walls can be poured at the same time that the floor is. The means we don't have to set up forms just for the floor, and then build the walls around the floor.


 Here another form is being readied.

They actually come folded up, and they unfold them, and then stack them.


When they get to the center of the wall, they have to cut the forms to fit in. Here they are measuring.

Since the forms are made of foam and plastic, they can just cut them with a hand saw. They measure, then they trim the form to fit in.

 
 Here the layers for this wall have been put in place, and they are just adding the re-bar to the last form.

I took one of the pieces they trimmed off, so that I could get some better pictures to show what the forms are like. Each wall form comes as a 1 1/2 foot tall by 8 foot long block. For my walls, they unfold to be about 13 inches thick.


This is the form folded up.

The black piece of plastic that is running from the left middle, to the bottom center, is embedded in the foam. It actually serves as an anchor point for wall finishes on the inside and the outside of the wall. They will be able to drive screws into the plastic, and it will hold them. To find where these anchors are embedded in the foam once the wall is done, they look for the squiggly lines on the face of the foam. You can see them on the foam that is on top, in the above image. The ties that run through the concrete, are hinged on the pieces that are embedded in the foam, so the whole form can fold up to take up less space on a truck.

 
Here it is unfolded.

With these forms unfolded, the foam sides are 8 inches apart, for making an 8 inch thick concrete wall. You can also see how the foam has the plugs and sockets on the top edge (there are matching plugs and sockets on the bottom), which would connect to a form placed on top of this one. They also put teeth or grooves into the inside surface of the foam, so that it will hold tightly to the concrete. You can see the jagged edge on the inside of the form. The concrete will fill these in, and lock the foam to the surface of the concrete. So it is joined to the concrete with the ties, and in between the ties, the surface is firmly attached to the surface of the concrete as well.

 
 Here is a better look at the ties that will be embedded in the concrete.

Above, you saw where they were adding the rebar to the forms. To have it located in the correct place, they put it into the rounded slots you see in the ties. As they go up, on each layer, they shift the rebar from one set of slots to another. Then when they put in the vertical rebar, it will slide down between the rows of rebar they layed in horizontally, and it will end up being like a woven mesh of steel. They also layed a wire mesh in to the tops of the forms. I don't have a good picture of it, but it looks like a row of wire squares. This should make one heck of a strong wall!

Tuesday, November 24, 2009

Gravel, dump trucks, and bobcats, OH MY!

Well, for all those who have braved my driveway, it is in much better form now. I went out to the property at lunch time to see what was happening. Well, I found that the driveway was covered in a new layer of rock, that extended up to where the garage will be.


Looking across the driveway in progress, and seeing quite a pile of gravel in my garage entrance.

The rocks had quite a range in size. Some were almost as big as my feet. But most of them were just 2 to 3 inches in size. They were somewhat slippery but should provide a good base.

I went to see what they were doing with all the gravel they had sitting there. They had already spread quite a bit in around the footers when I got there. They were laying out the drainage system. They had put gravel inside the footers, and were starting to cover parts of the drainage system.


Working to cover the drain tile.


Adding more gravel for under the floor slab.


That is a lot of gravel.

This should be just a small amount of the gravel that will eventually be used in providing drainage around the home.

With the large rock on the driveway, it was still a challenge to drive up. They decided it needed to have smaller stuff put down, so that it would be more passable.


The first dump truck made it up the driveway. After a couple tries.

The second dump truck tried to come up backwards. That simply did not work. He had to turn around, and bring the load up forwards, then turn around at the top. He had some trouble when he got his back tires off the rock, and into the mud. But he managed to deliver his load of #411 (rock powder, up to pieces a little bigger than pea gravel).


Now the driveway has a better surface.

It will be interesting to see tomorrow how it feels to drive up the new driveway.