Monday, March 28, 2011

Siding continues, and sticker shock

Siding work continued last Saturday. My dad and I worked on getting the supports added for the front lights, and the outdoor outlet.

Supports and boxes for the lights, and supports for the outlet ready to be covered.

Then we put up the last two big boards. Now all that was left were the pieces for over the door, and the windows.

Just a few pieces left.

We looked over the various pieces that had been cut from the panels we had already used. We found pieces we could cut from for all the remaining locations, and we started cutting. The piece for over the front door was simple. However, the rest of them required transferring the curves from the window tops, onto the Hardie panels, and cutting the curves. That was done, by stapling large pieces of paper above the windows, and then cutting the edges to fit the space that was available. Then we traced the outline onto the Hardie panel, and cut carefully. Dad was quite skilled at using the circular saw to make a rough cut, and then smooth it up to get the fit we wanted.

This process creates a lot of dust. So we wear masks when we work with these panels. Thankfully we are just about done having to cut them. But it was a cold and dusty afternoon.

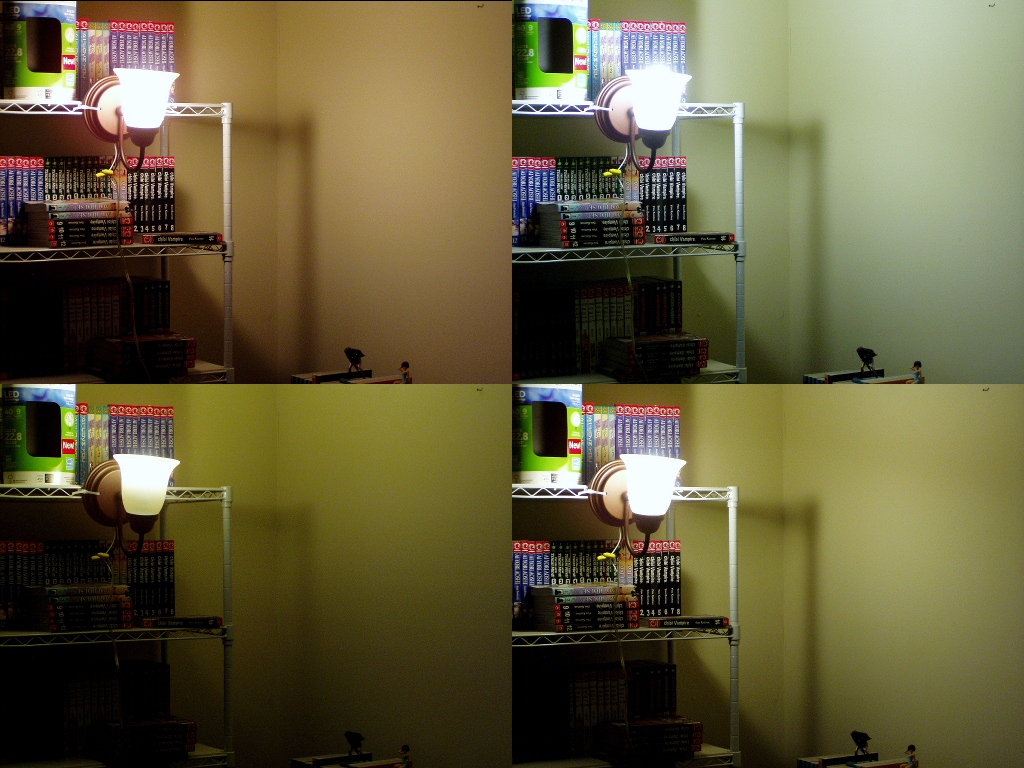
Panel to go over the guest bedroom window with the rough curve cut in it.

Temperatures outside got up to a little over freezing, but with the propane heater running inside, we had it over 60. It was quite comfortable inside. I got all the edges coated with primer, and they will be ready put up next weekend.

We also checked on a couple things while we were out there. One item was the generator. I had found after I had the generator, that the warranty was reduced from 5 years to 18 months if you don't have a reliable public utility providing your main power. If you don't have an authorized service rep do the "startup" then your warranty starts from the date of manufacture, not the date when you first put it into service, and so would be further shortened. I had read the manuals that came with the generator, and had been in touch with an "authorized service rep". The price for "starting the generator" was quite a shock (around 20% of the cost I had paid for the generator). When I initially had talked to them, I had presumed that the final connections for the gas and electric would be included in that "startup". But when I asked them how the gas piping and electrical wire should be terminated for them to do the "startup" they informed me that the gas and electrical connections had to be finished before they got there. The "startup" service call, was only a little more than them running through a checklist included with the generator and verifying that things had been done correctly. They would run some tests included in that checklist, which can't be performed by an end user without the correct equipment/software, to make sure it shutdown automatically if there was a problem. So I needed to look to see what was going to be involved in making these connections and having it ready for them to "look at". I found there will be a fair amount of time spent to get the panels inside unbolted and out of the way so that I can get to where the connections need to be made. I also found that the generator is currently configured to run on natural gas and that I will have to go through the process to switch it over to run on propane. I am finding myself wishing that I had bought a less expensive generator, since this is going to cost me more in time/dollars than I thought it would. I am thinking that buying the extra few months on my warranty is not worth what the service rep wants to charge.

On Sunday afternoon, Matt went out with me, and helped me start installing the Trex trim work. We started with the base pieces on the garage side. These pieces are along the bottom of the Hardie panel. It took longer than I had hoped, but I figured out some things as we went along. The work was slowed by the fact that I had to custom fit two sides to the rock walls, and I had to lay out the plan for the pieces before we could get started. I also need to use a different saw for making the straight cuts. The circular saw can be used, but to make a very straight and clean cut, I had to work slowly. We have used dad's power miter saw for cutting pieces at his place, and it works fast and makes very nice cuts. I think we will be hauling it out to cut the ends of the rest of the trim boards.


Thursday, March 17, 2011

Rocks, rolling, and heavy metal

Well, it has been a bit since the last post hasn't it?

Until the last week or so, the weather has been terrible on the weekends. But I did a few things. I have been looking for low power lights that will actually light up a room. I have been hoping to find LED lights that would fit the bill. While the good ones are still darn expensive, they use very little electricity (looks like between 1/6 and 1/4 of an incandescent), come on instantly (no delay like a CFL) and should last a very long time. I saw an ad for Lowe's with a new LED general lighting bulb, so I decided to pick one up and compare it to some other lights.


I forced my camera to take pictures with pretty much the same settings even though there were different lighting conditions so I could make a comparison.

The light in the upper left is a 40 watt incandescent. A bit red in color, but overall pleasing light. Bulb gets too hot to touch almost immediately. Most of the electricity it uses is turned into heat.

I did not have a 40 watt equivalent CFL, so I compared a 60 watt equivalent. The CFL stays much cooler, but took about 5 minutes to get up to full brightness. The light is rather harsh, and it is a little too large for this fixture, and pokes out of the top. The CFL is in the upper right.

I had a 40 equivalent LED bulb that I had bought previously. It only used about 6 watts. The light was a bit more yellow than I wanted, and it didn't light up the fixture vary evenly. So most of the light was thrown up toward the ceiling and very little was cast downwards. It came up to full brightness almost instantly, and even after a number of minutes was only a little too warm to touch comfortably. This is the one shown in the lower left.

In the lower right is the new LED bulb. I was quite pleased with it. It used about the same amount of electricity as the other LED bulb, but it put out the light in a much more even pattern, and the color was a bit better.

Three weekends ago, the weather was lousy and Dad did not feel well. So I worked on assembly work on the columns that we have been working on, and on some of the supports we will use for the electrical wires above the ceiling.


Then last weekend was looking like it was going to have very good weather for getting some outside work done. I called Adam, and he told me he could be available for helping put the generator in place, and moving dirt and gravel. We agreed that Saturday afternoon should work fine for him to come over and help. Dad and I decided to take vacation on Friday and Monday, so we would have a good long weekend to work. Thursday evening, we had snow! Obviously, this was not what I expected from an early spring. It was pretty, but I would have been happy to have had dry weather.


Well, while that melted off, we worked inside Friday morning. We worked on putting supports up in the joist space for the electrical wires, and I made notations of where I was going to change the wiring routes on my plan. Here are some of the supports up in place.


Then Saturday we headed out and started figuring out what duct work I would need for the ventilation system. Adam came over in the morning to see how things were going. He hadn't seen the place in a while, and thought we were making good progress. He said that some things had come up, and he wouldn't be available that afternoon. I told him that the ground still seemed awfully soft, so I figured if we waited till Monday, it would work out better anyway. We walked around the property and discussed the work that I wanted done. He suggested getting some landscape timbers, and making a box to pile gravel into for where the generator would sit, rather than just trying to keep gravel in place on the ground.

We got the wood for the box around the generator, and some of the duct work for the ventilation system. We cut rebar from some of what was left from forming the walls of the house, to use as spikes to hold the timbers in place.


We took the pieces of duct work into the hobby room and assembled the long pieces. I probably still have a dozen or more pieces of metal duct to get.


We also worked on getting holes cut in the two big pieces of Hardie panel left to put on the front. We needed the holes for the wiring boxes for the front lights. We started with a hole saw, then dad finished cutting them on Monday.


Sunday we did quite a bit of planning and then baby sat my niece.

Monday we got out to the property early. Dad and I started by assembling the box for the generator pad. As we were finishing that up, Adam came up the drive and dropped off the forks for his Bobcat. He went and did some grading while we finished the box. When we were done with that he came over and lifted the generator. We put pipes through holes in the base so he could lift it properly. Then when he got it over to the pad, we put out pieces of wood and he set the pipes down on the wood and helped us roll the generator into place. Then lifting one end at a time, we got the wood pulled out and set the generator down into place.


Adam got the area around the well filled in, and graded out.


The backfill around the house, had settled quite a bit. So Adam dug up more dirt from the property, and buried the house again. As Adam was working on this, we found places where the drainage material had been pulled out of place, or ripped by the settling. We took the drainage material that I had left, and patched over those areas before Adam backfilled over them. Our friend Bob wanted to see how things were going, and so he came out on Monday. We put him to work. He was a big help in getting the drainage material patches in place. These pieces were large, and needed more than two people to get them put where they needed to go.

Adam brought the east backfill back up to the roof level.

On the north side, all the water flowing off the roof, had settled the ground a lot, and also had been cutting valleys in the dirt. I decided I wanted better drainage for most of the roof, especially near the vents through the roof. So we took drain tile, and some of the gravel I had from the last load that was delivered, and put drainage material down to guide the water to where I wanted it to go. We took more drain tile, down the hill, and back into the woods.

We added drainage before Adam backfilled the north side.

Now last year, when we fixed the pipes that had broken, Adam also dug up some dirt for backfill. He dug in an area back in the woods and over the winter it has gotten a lot of water in it. I now had a pond and Adam wanted to get more dirt from back there. So he formed a nice little wall, and I had a proper looking muddy pond!

 The deer have been enjoying having this nice watering hole.

We took most of what was left of the gravel, and filled in an area around the vent and electrical pipes, and an area in front of the solar array.

It will help keep the mud from being so bad in those areas.

Adam said he is going to do some more backfill work tomorrow. I'll have to see if I can make time to stop by and check on the progress.