"How many sq feet is your home? What are the particular building code issues that you had to work around in your design besides providing egress in the bedrooms?"
It has approximately 1800 square feet of living space.
Besides the egress concerns, codes guided a number of decisions. Even if I did not require inspections, I still would have read up on the codes. They provide a set of minimal guidelines, and most of them have not been any problem to address. I will have perhaps a couple more smoke detectors than I think are really necessary for a safe house, but that is minor issue.
Some of the plumbing codes are causing me a bit of a headache. I wanted to avoid penetrations through my roof, but the way the code is written for my state, they require that at least one vent goes through the roof. So, I am going to have to cut a hole in the roof, and then seal it back up around the vent pipe. I would have preferred a side wall vent, but at least one roof vent is specifically required. I am sure it ended up being written that way because someone did something really dumb, as a result I am not permitted to work out a sensible alternative.
Some of my rooms are going to have way more outlets than they should every need, but having the outlets at regular, short intervals, makes sense for most houses, and most rooms. My breaker panel will have have a main breaker, that far exceeds what my generator, or my solar power system will be capable of pushing into it. However, here again, that is a minor issue.
Overall, I would say that reading through the code books, has given me more ideas for alternative ways to do various things, than it has restricted me.
Now Marcus asked me: "Where are the pictures of the finished septic system?"
Well, I was a bit busy over the weekend. Last night and tonight, I was working with my family to get things all ready for the concrete later this week. But to make Marcus happy ;-)
On Friday morning, the inspector came out to look over the septic system that "I installed". He knew Adam and John from past systems they had put in, and knew they had done the work. He got his laser level set up, and started checking to make sure the various parts had the correct elevations relative to one another. We listened as he went across the field with the pole letting out beeps to indicate when things were matching the correct height.

"Can you hear me now?"

"Can you hear me now?"
The inspector didn't have any problem with the system. With the inspection passed, and permit to use it in my hand, Adam started turning the mounds back into flat ground.

Flattening the hills

Working on leveling out the leach field

On Saturday my dad and I worked on getting the fasteners for the Trex fabricated. The Trex that is going to be used as furring strips on the overhang, needs to be attached to the steel joists. We had looked for the right sort of bolt to use, but when we failed to find ones that would work, we made our own. I bought lengths of rod with threads cut in it, and we cut these rods into the correct length pieces, and smoothed up the jagged ends so the nuts would go on easily.

A pile of bolts!
We made two different length bolts, and in total, we fabricated 64.
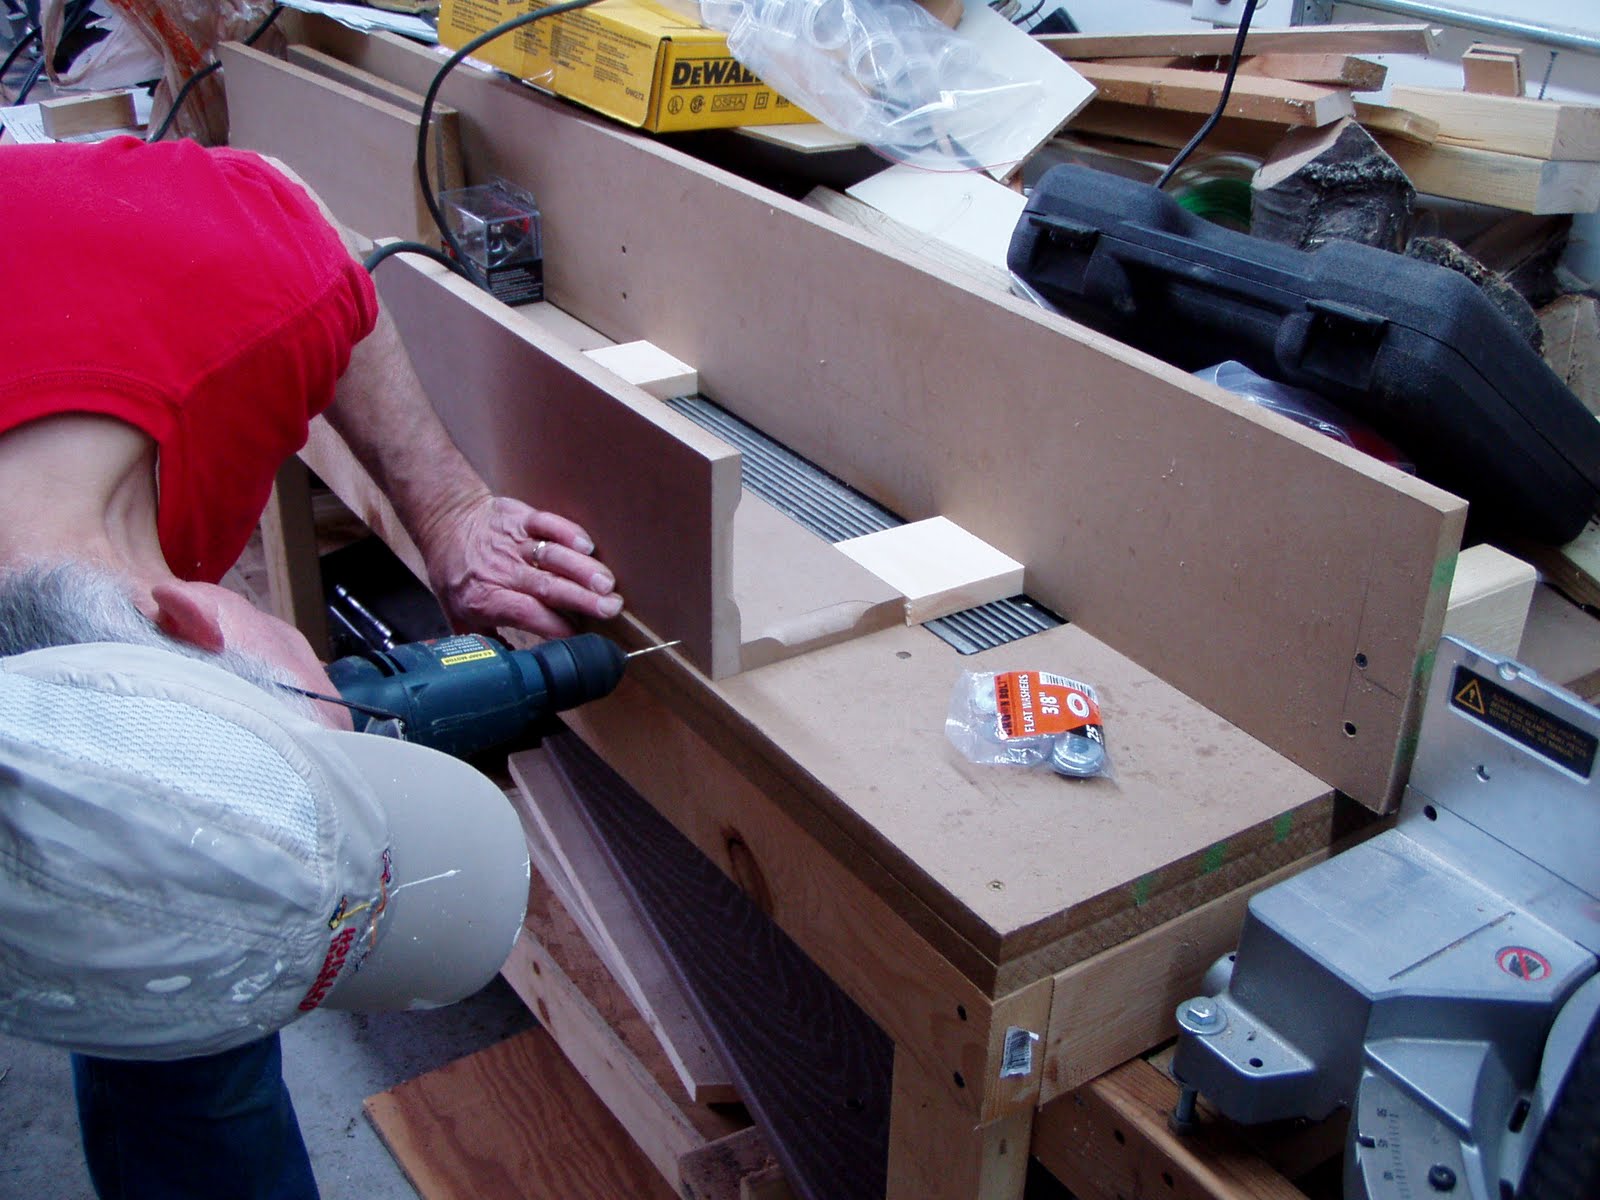
For my electrical wiring, and the hot and cold water lines, I am going to run the wire and tubing up between and through the joists. I had talked to the inspector, and he wanted me to run the wiring through something non-conducting, to ensure that the insulation on the wire would not be resting directly on the metal of the joists. My dad came up with the idea of building brackets that would slip onto the angled bars in the joists. The brackets will sit securely in place, and then we will just drill holes through the bracket to hold the wiring and plumbing.
We fabricated up a prototype to test the idea. The two pieces at an angle, with an edge cut out, will sit on top of the bars. The other piece of wood, will have the holes drilled, to allow the wires and tubing to pass through.

Prototype wire/pipe bracket (upside down from the way it will be installed)
We also worked out the final design for the box that is going to hold my batteries.
On Sunday, we worked on a jig to help us prepare the tubing that will be used for the air intakes for the house. The tubes will run underground, and during the spring and summer, as humid air is pulled through the tubes and cooled, water will probably condense on the walls of the tubing. The tubing is corrugated, and so the water would run down the sides, and collect in the bottom of the corrugations. We are going to put gravel under the tubes, so that they can drain, but we need to make openings in the corrugations so that the water can exit the tubing and get to the gravel. To do this, we need a jig that will position the tubing over the saw. We fabricated a box with open ends, that can be clamped to dad's table saw, to guide the tube right over the saw blade.
Putting the jig together

Mounted on the table saw

Slots cut in the bottom of the corrugations
Last night, my dad and Matt helped me mark where the piers need to be be dug for the solar array. They also helped me move re-bar, and wood where they are out of the way of where the concrete trucks will need to get to.
Tonight, my dad helped me work on getting foam in place in the garage. I want to have insulation between the heated house floor, and the unheated garage floor. To put the insulation in, we needed to dig the gravel in the garage away from the two edges that are toward the other rooms in the house. Then we set the foam sheets down, and put the gravel back in place.

First two sheets are in place for the concrete pour.
I am going to finish placing the foam sheets tomorrow. Then hopefully, Doug will be able to dig for the piers and prep the garage on Thursday, and pour concrete on Friday.
Thank you! :) I have actually started a blog that covers current projects. I wanted to add a little more detail about your project. You can take a look at http://www.earthsheltered.org. I have plans in my future to build my own.
ReplyDeleteOne more thing. Would you mind if I stole a pic from your blog of your home for a link on my site?
ReplyDeleteAh, I see you have found a number of the same blogs I have :)
ReplyDeleteSome of your reasons are the same ones that I have for building earth sheltered. I also didn't want a concrete bunker look, and wanted to have my own hands in the design. My house won't necessarily be "light and airy" but I don't care for that feeling in my own house anyway. My back rooms will not get much sun, but that is on purpose. I will be interested in seeing what sort of floor plan you arrive at.
Yes, it would be fine if you wish to have an image to associate with the link.
Thanks, BD. I am looking at a traditional passive solar design. Think double shed roof design with the clerestory windows. Two bedrooms, both up front and the living/kitchen etc. in the back. So the back will have mainly the clerestories for light and higher ceilings. But that is this month's design...he he...it changes. I want to build with cash so it will be some time. But I am having fun planning. I plan to head up north here in Michigan soon and check out Adam Bearup's earth shelter project. Massive! But he seems very friendly and I can't wait to talk his ear off :)
ReplyDelete