This last weekend we made use of the 3 day weekend, and continued to work on getting the facade on the overhang, and the walls next to it done. We needed to add some furring strips to the buffer boards to space the trim and siding materials out the proper distance so they would match the rest of the wall. To space the Hardie panel out from the buffer boards, we needed about a 1/4 inch spacer. We drilled holes in the aluminum pieces we had left from fabricating the furring strip reinforcements for the garage side. These will go behind the Hardie panels on the side toward the retaining walls and added to the buffer board thickness (3/4 inch) will place it out the same distance from the surface of the ICF walls as the 1 inch thick Trex deck boards that will be used as furring strips on the rest of the wall. I didn't want to leave the cut Hardie panel edges exposed next to the retaining walls, and so we needed to fabricate a piece of Trex to provide a space between the buffer boards and the trim board, so that it would be able to overlap the edge of the Hardie panel. We didn't have a planer (we aren't sure how well a planer would have worked with the Trex anyway) so we used the table saw, and cut a thin strip off the surface of the boards to make them thinner. This was what was left behind.

The picture doesn't do justice to the pile of Trex dust
We realized on Saturday as we looked at the walls, that trying to have the Hardie panel go all the way up the buffer boards between the retaining wall and the overhang, was likely to have a lot of difficulties. Looking at it I saw that it would look better to continue the Trex trim boards from the overhang to the retaining walls. So we cut boards to about the right size, then put them up, and marked where they ran into the blocks, and made adjustments, and continued until they fit very well.

A close fit to the retaining wall
Sunday, Matt came out, and we worked on the drip edge for the front of the overhang. We cut a groove along the bottom of the top board a little back from the outside edge. We did this so that any water running down from the top, would drip off rather than running back to where the boards are connected. We attached a 12 foot trim board, to a 16 foot deck board. We did that in the garage, then took the whole assembly up on the roof. Here is where it was best to have three people.

Fastening the trim board to the the deck board underneath.
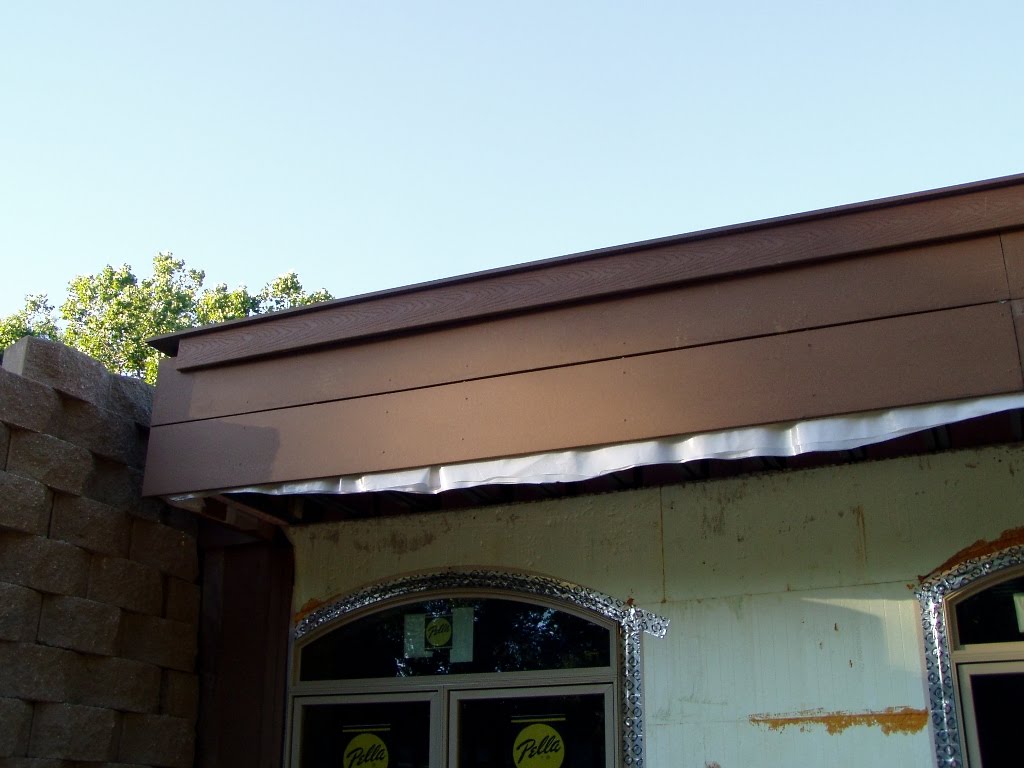
The drip edge sitting in position
We found yet another issue as we placed the drip edge pieces in place. I had noticed earlier, as I was getting the foam blocking between the joists, sealed up, that the joists looked to vary somewhat in and out along the wall. We found that when we put the drip edge up, there was a place where dad could put his hand up behind it, yet it met the trim boards at the two ends. From a very awkward position, I sighted along the trim boards. They bowed in! Well, we hadn't put spacers in behind the Trex boards we attached to the joists, so there is probably some variance from that in addition to the joist ends not hanging quite the same distance out from the wall.
I was worried this would compromise our ability to securely attach the drip edge to the trim boards. I was just going to use the weight of the earth on the roof edge to hold the top of the drip edge down securely. I decided we needed to better secure the back edge of the drip edge, and we needed to seal up the gap we were going to have between the drip edge and the trim boards.
Labor Day, we picked up more Trex deck boards, and some thick weather stripping. We cut the boards to make what I am calling outriggers. We went to the house, and got the weather stripping attached to the bottom board on the drip edge, and put the first edge in place. We started fastening on the front, and got the screws to pull the board in pretty well. We attached where we had the boards on the front of the joists, so we had the thickest material available to fasten into.
We trimmed the 16 foot deck boards on the drip edges, and put in a partial trim board to finish the front drip edge. Here is how it looks.

Front drip edge in place and secured
We attached the outriggers, so that they will provide extra holding power to keep the drip edge from trying to lean off the front. I am going to put some sand under the outriggers before I cover them, so they are supported to minimize stress where they are attached to the drip edge. This will result in a well secured drip edge with no penetrations through the roof waterproofing.

Outriggers attached to help hold the drip edge on the roof
We cut the groove in the drip edge, so that it wraps around to meet the groove in the boards we will put on the sides of the overhang. Here you can see a little more detail.

You can see the side groove at the back of the board
I am hoping that tomorrow evening we can finish the rest of the drip edge details, and I will have a photo to show of how it looks with it all in place.
No comments:
Post a Comment